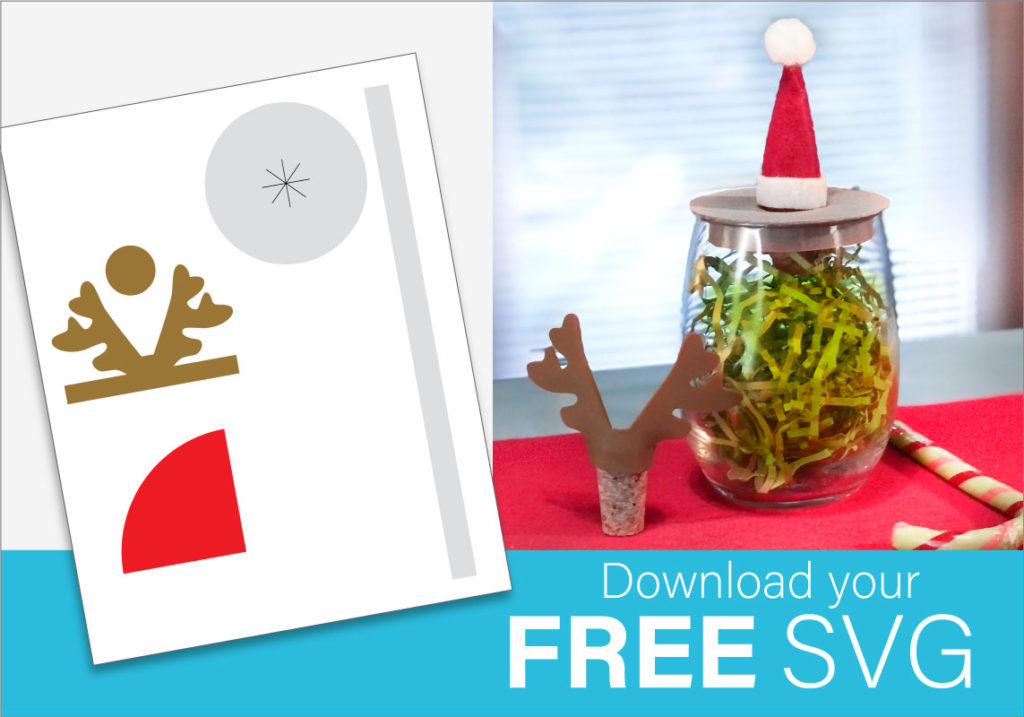
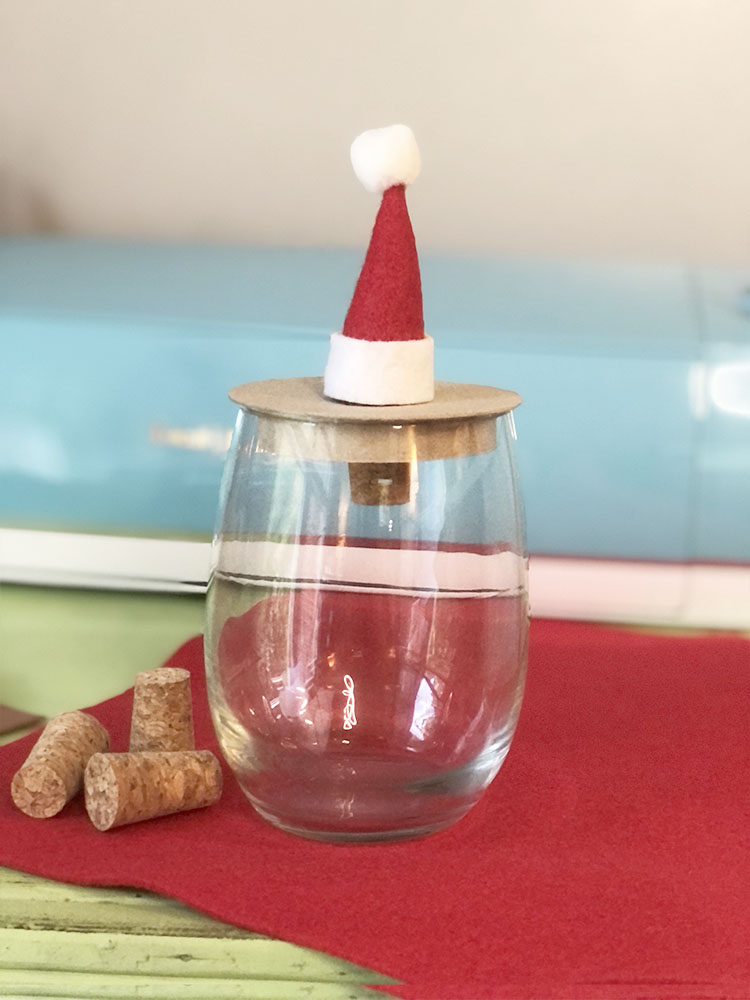
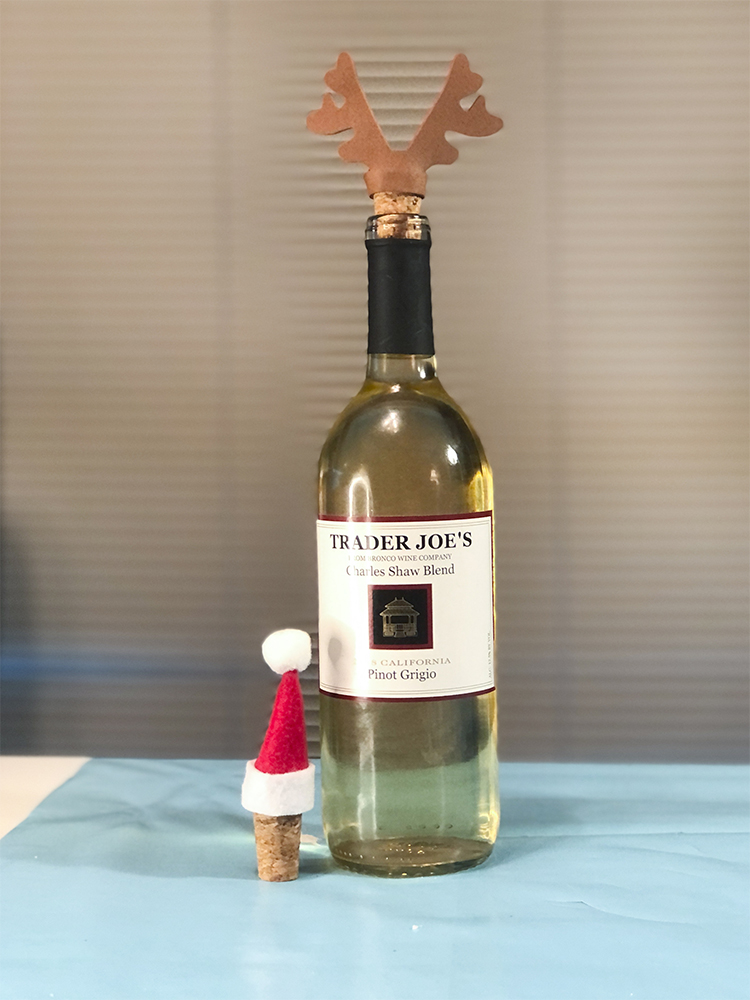
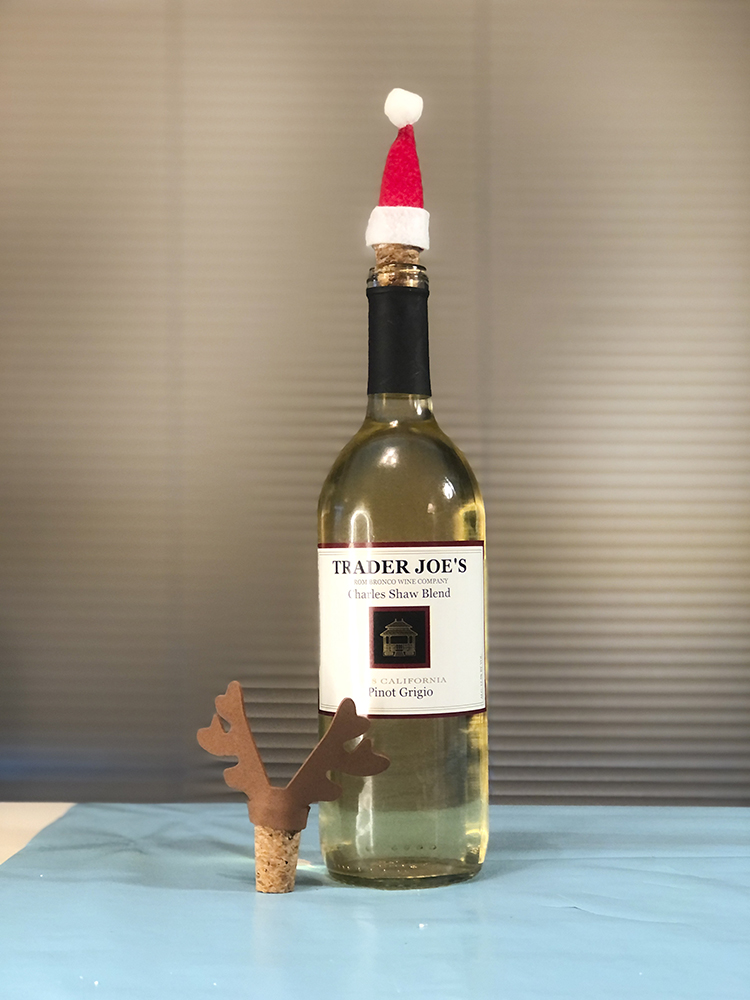
Today we getting our Christmas booze on with these adorable Reindeer and Santa hat wine corks. They are going to be a perfect as gifts to your boozy bestie this Christmas! These are easy and fun to make.
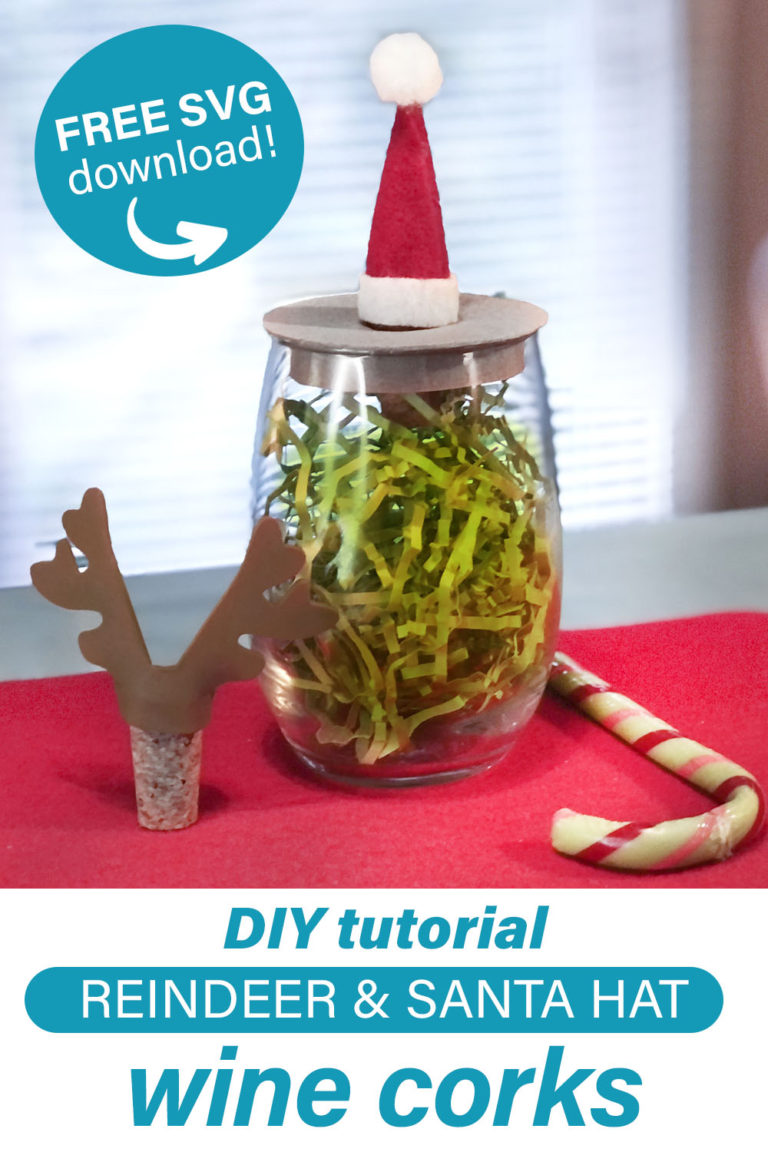
Ok, so first you’re going to want to download the free SVG for this project for your Cricut or other craft cutting machine. Just sign up below and I’ll email the file to you.
Sign Up to Download
Sign up to receive email notifications of when I post new DIY projects, ideas and other cool stuff on my site! You’ll get inspiration and freebies delivered right to your inbox and I promise not to fill your inbox with clutter!
You will be taken to another page to download the file after you click button. Please contact me if you have any issues.
I respect your privacy. Unsubscribe at any time. Free files are for personal use only.
Already signed up to receive emails?Check your inbox for the latest newsletter, which includes this freebie!
I picked up a few of these stemless wine glasses from Dollar Tree, but you can use any glass you want. The SVG is set up for the opening of these Dollar Tree stemless wine glasses, so if you use another glass, you may want to adjust the circle in your craft cutter design software to fit your size. I then bought these corks from Amazon. They come 30 in a pack for about $10.
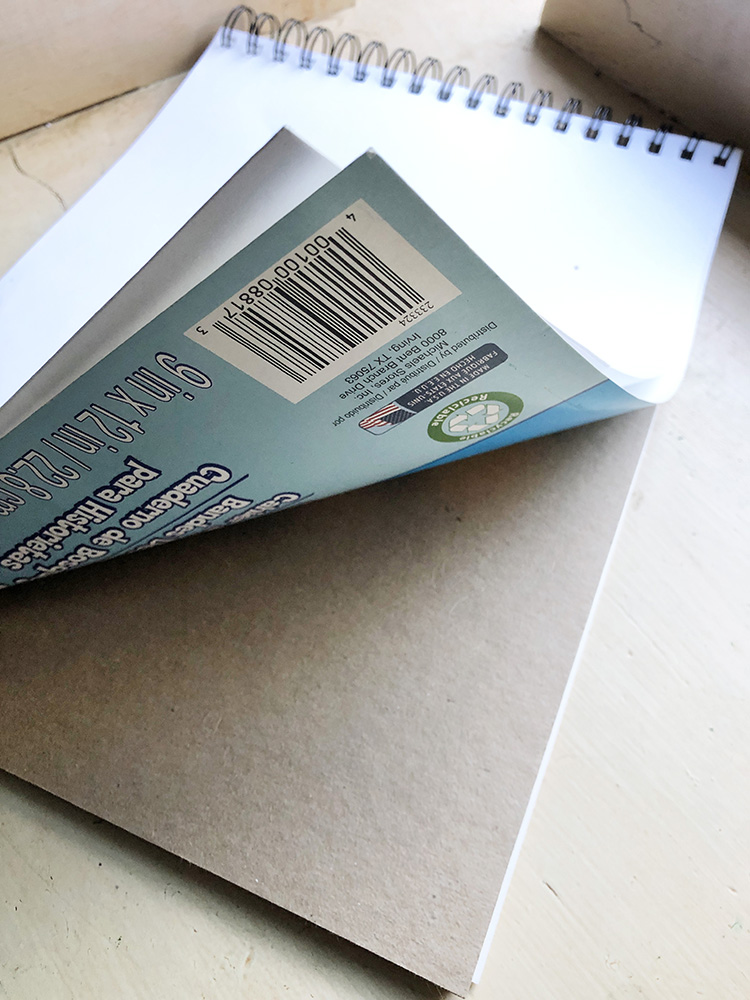
As for the cork holder glass lid, I just use some chipboard that I got from the back of a notepad. You could also use a thin cardboard, or a thicker cardstock that you already have on hand.
I just used some chipboard from the back of a notebook I had, but you can also use any color cardstock you’d like.
First, just place the cardstock on your cutting mat, load it into your cricut and select the correct cardboard or cardstock material setting. I have a Cricut Explore Air 2 here that I am using and I am using the deep cut blade because of the thicker chipboard I am using.
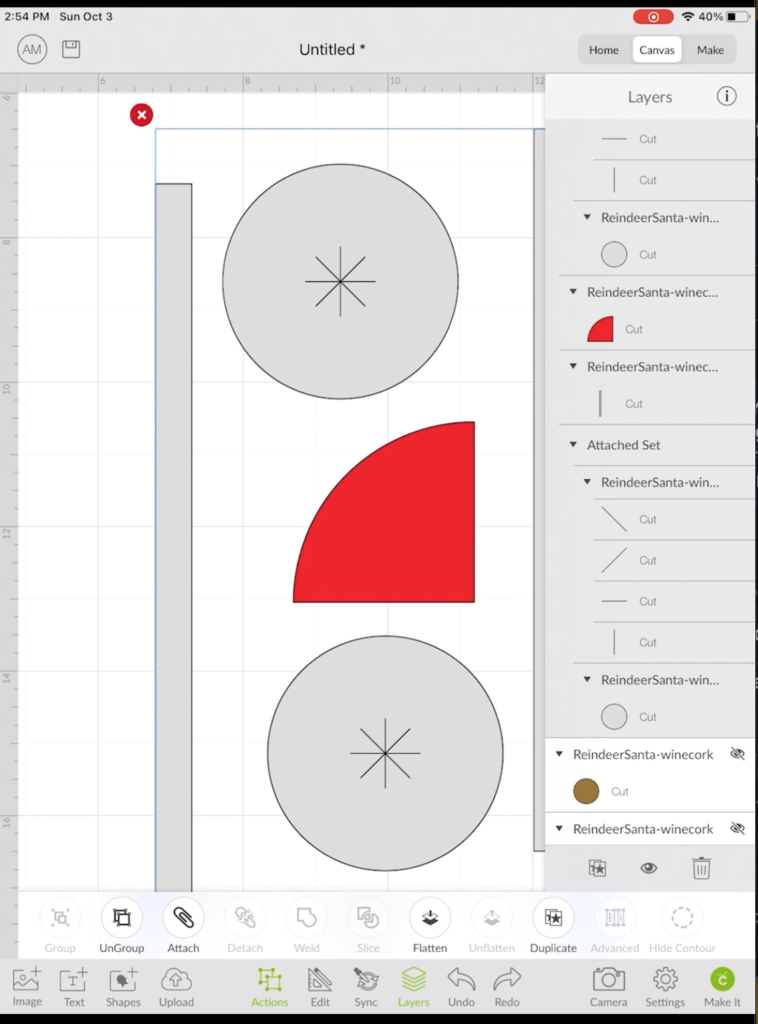
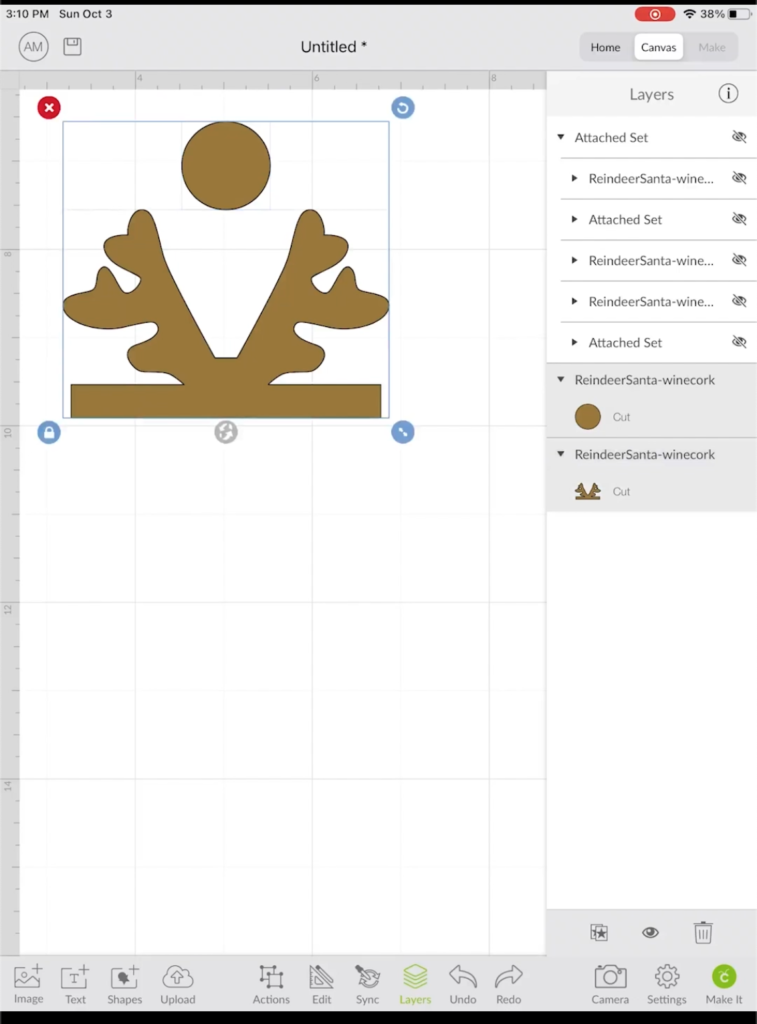
Now, let’s jump over to Cricut design space and since we’ve already downloaded the free SVG project file from my website, we need to start a new project and click on Upload. Find our file and we are going to hide the pieces we aren’t cutting on the chipboard. Hide the brown reindeer pieces (the circle and the antlers, we’ll play with those next). I am moving the red piece over and then duplicating the grey pieces (circle and long strip) because we are going to make two corks (Reindeer and Santa Hat). You’ll see later what the red piece is for.
I’m assuming you know how to use your cutting machine for the most part, so I won’t go into much detail on how to do this, but we are welding these pieces altogether, so they will cut all at once. Hit Make it then select your material. I am selecting a custom flat cardboard material and setting my pressure to more, since this is a thick material I am using. Again, I am using a deep cut blade and now we just hit GO!
Bend strip into a ring
Bend strip into a ring and make sure it fits loosely into the opening of the wine glass opening
Finished lid once glued together. Make 2 of these.
CRAFT TIP! Use a fingernail file to sand any rough edges down.
Once that is all cut, go ahead and weed everything out. You should have two rectangle strips, two circles and one arc shape.
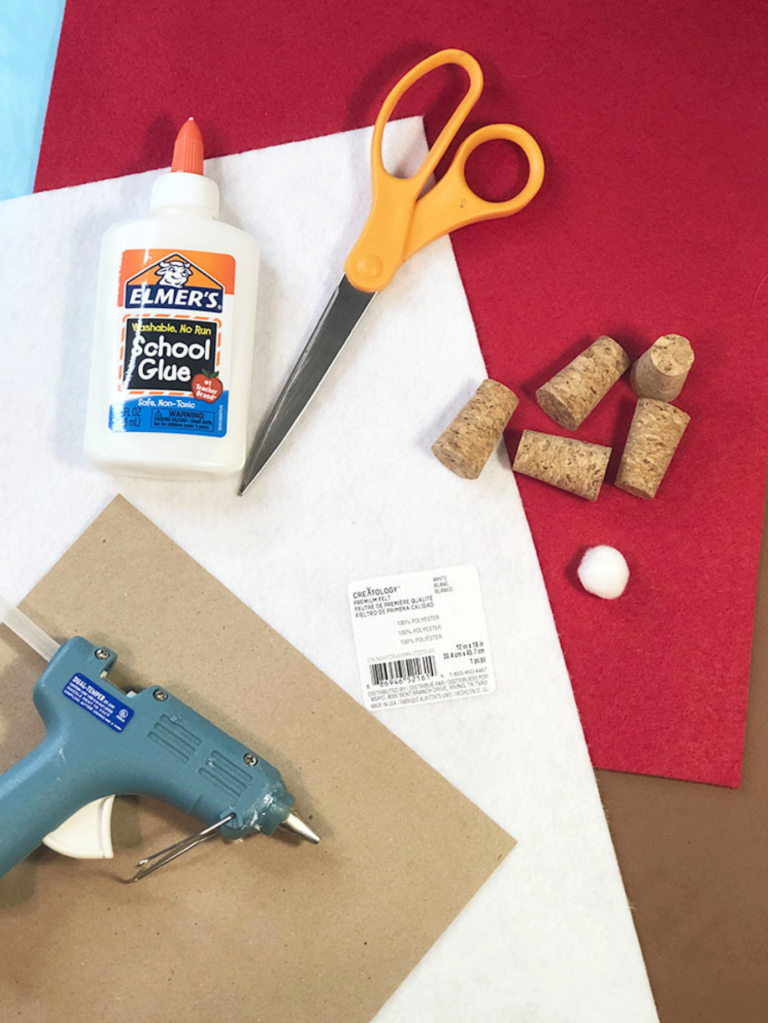
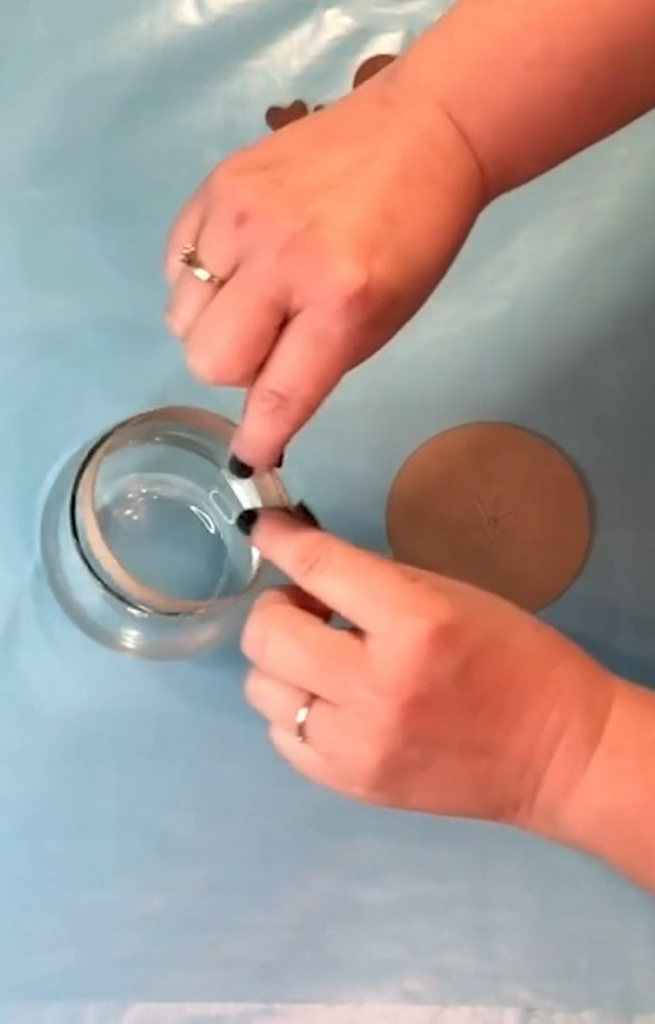
Now get your school glue out. This holder is made to fit the Dollar Tree stemless wine glasses, so if you aren’t using those, you may need to adjust your circle and these long rectangles a bit in Cricut design space to fit in your glass opening.
Make a ring with the rectangle piece that will fit a little loose inside the glass opening like the picture above. Then glue it with the school glue and I used a dollar tree clip to hold it together while it dries and then clip the excess off.
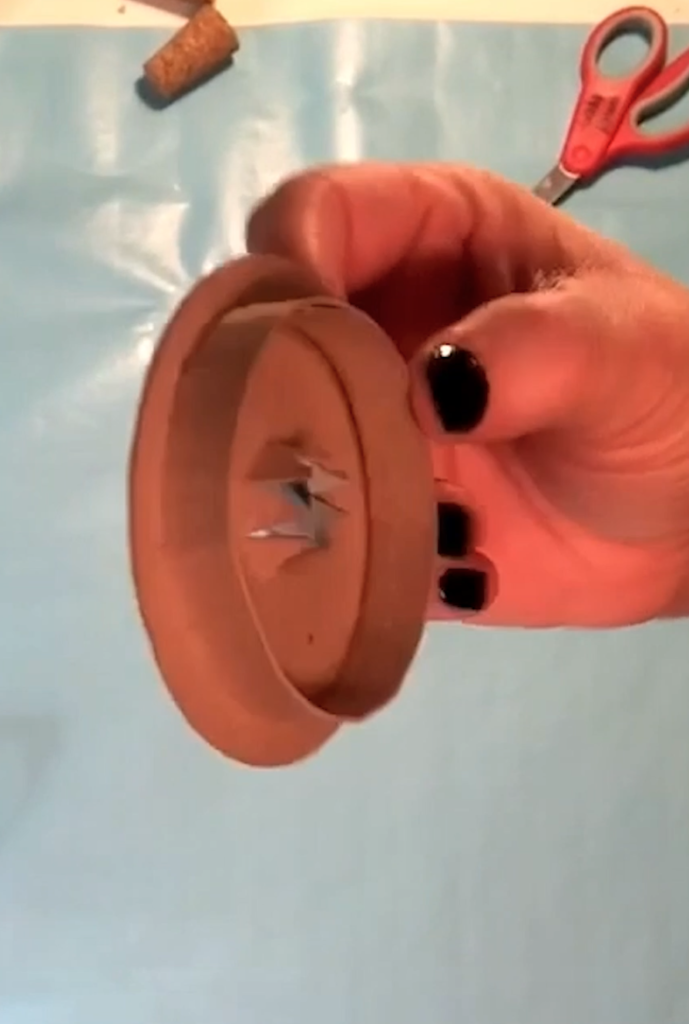
Now let’s take the round piece (this will just lay on top of the glass. This is where the cork will be held) and push the slits in the middle through. Next, take the ring and place it as centered as you can on the bottom of the circle and just use school glue to glue the ring to the circle from the inside.
See the image above to see how it should look like after it dries. Make one more and you should end up with 2 of these.
Let's make the Reindeer Cork next.
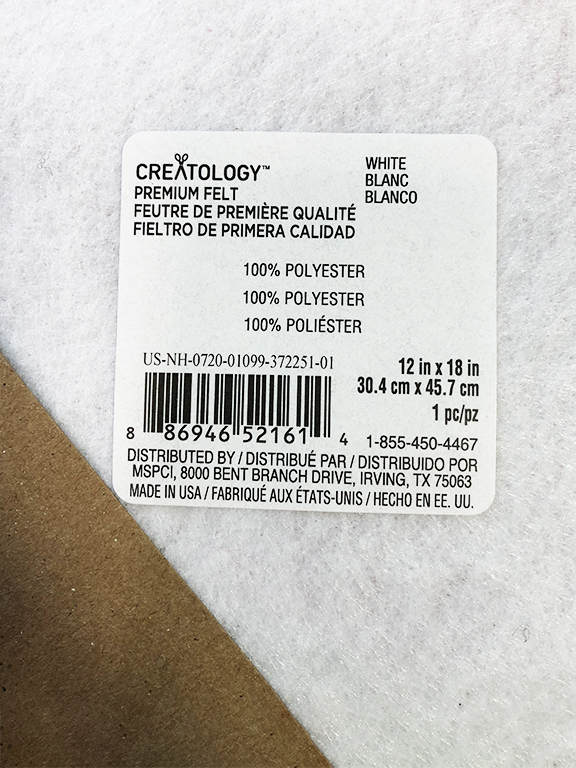
Get your tan craft foam sheet and put it on your cutting mat. Then load it into your Cricut and set to custom material. If you have a Cricut maker with a rotary cutting blade, you could totally use felt instead if you like, but I don’t have one and my Cricut doesn’t cut felt very well, so that’s why I am using craft foam.
Let’s jump back over to Cricut design space and hide all the stuff we cut out for the lid cork holder, and now show the two reindeer pieces. There’s a small circle and the antlers.
Attach those two pieces together and hit Make It. Set your material to craft foam. I’m still using my deep cut blade, but keeping the pressure to default this time. Then hit GO!
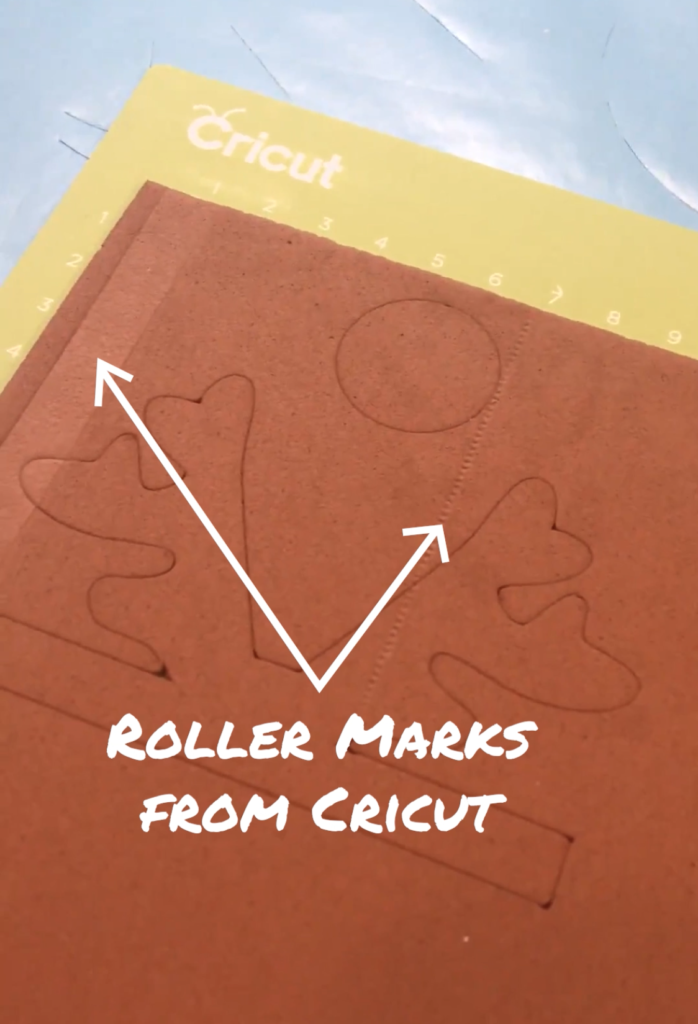
So one thing to keep in mind with the craft foam, the rollers from the Cricut machine will show up on the top (see picture). So I make sure the side that had the price tag on it, points up when I lay it on the cutting mat, so I know the ugly side of the foam will actually be the back side of the antlers.
Weed it all out and we are ready to assemble. Make sure you apply the glue to the ugly side with the roller marks on the antlers and circle. We don’t want those to show on the front.
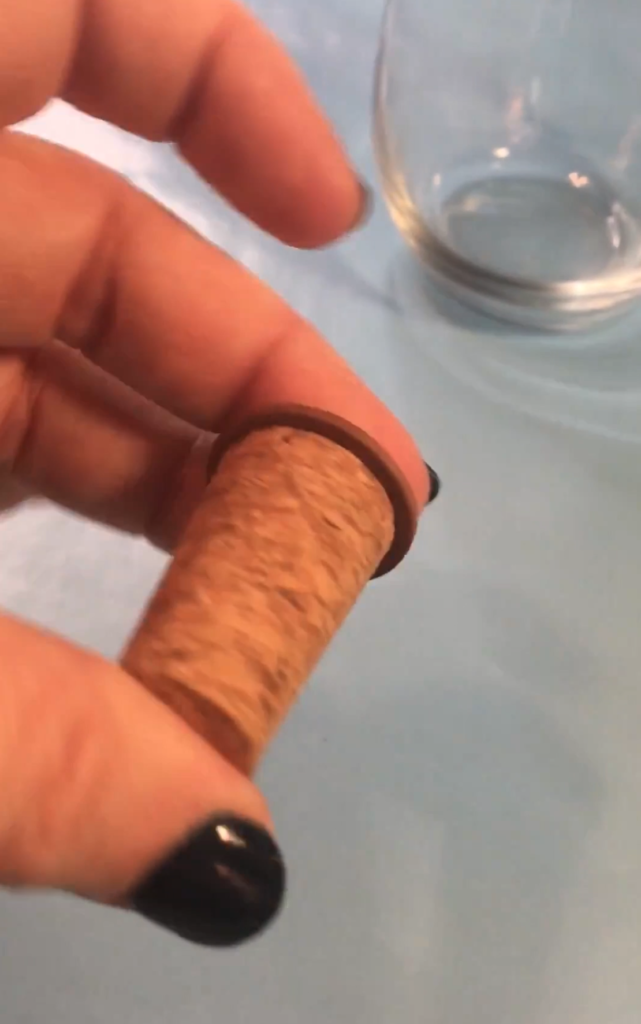
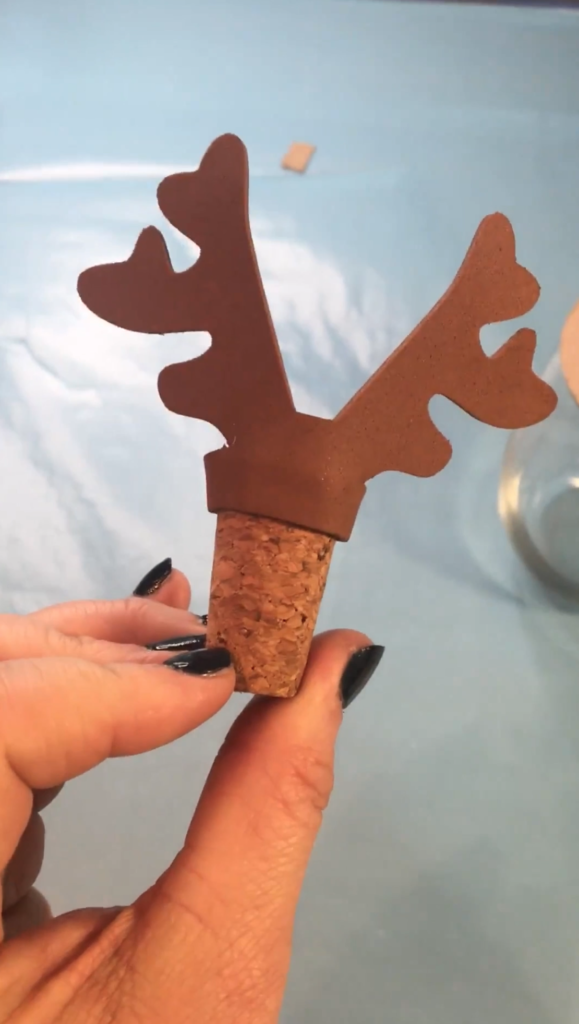
First just take some hot glue and glue the small circle to the wider top end of the cork. The circle should overlap a little bit. Just try to center it as much as possible.
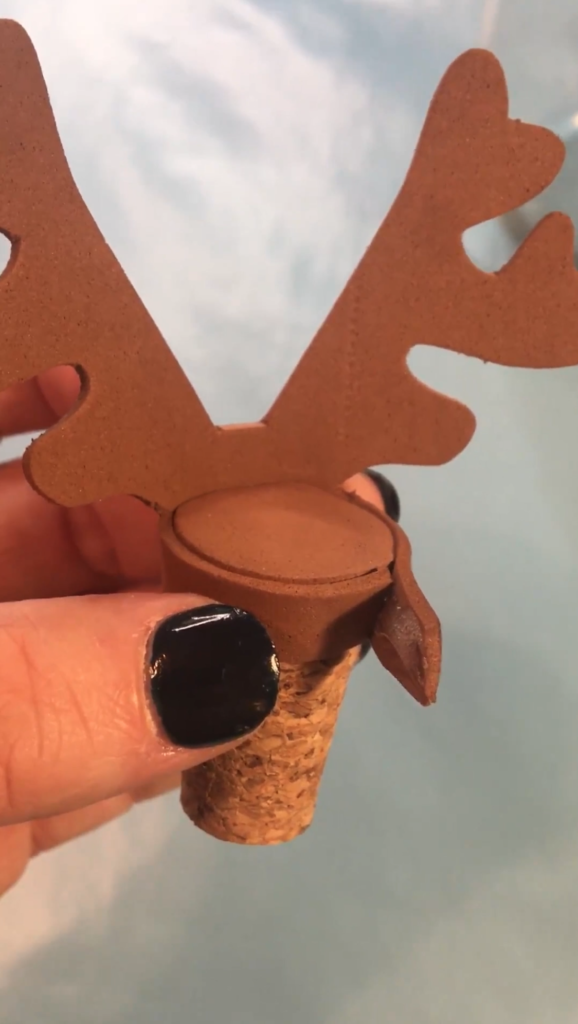
Then take your antler and put hot glue on the ugly side and wrap it around. Glue it down and cut off the excess.
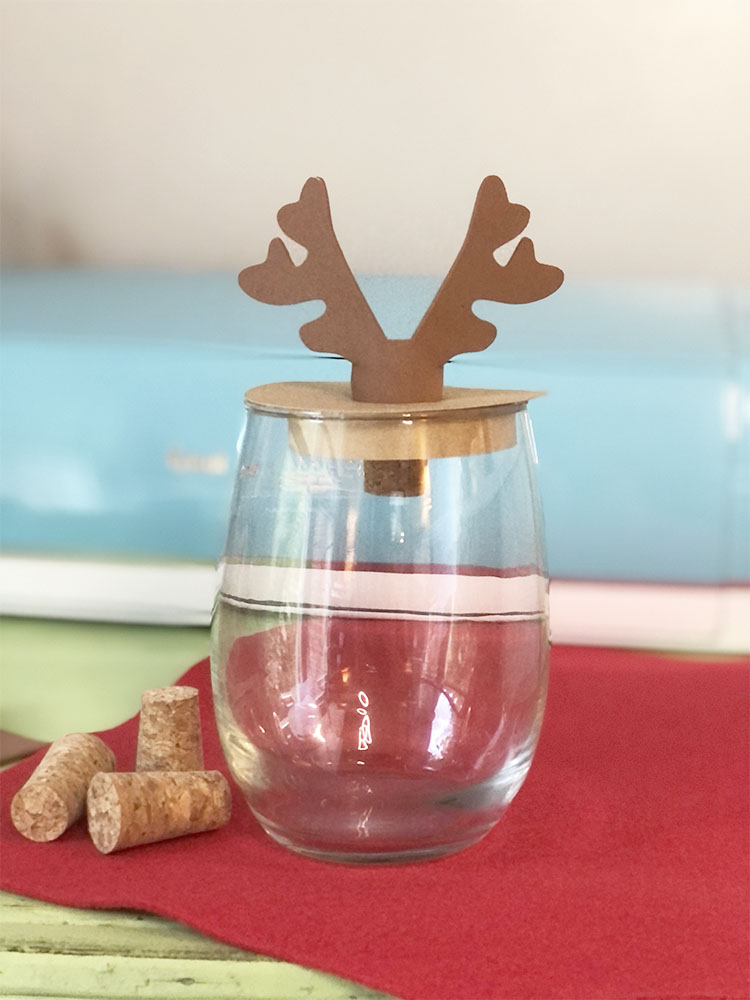
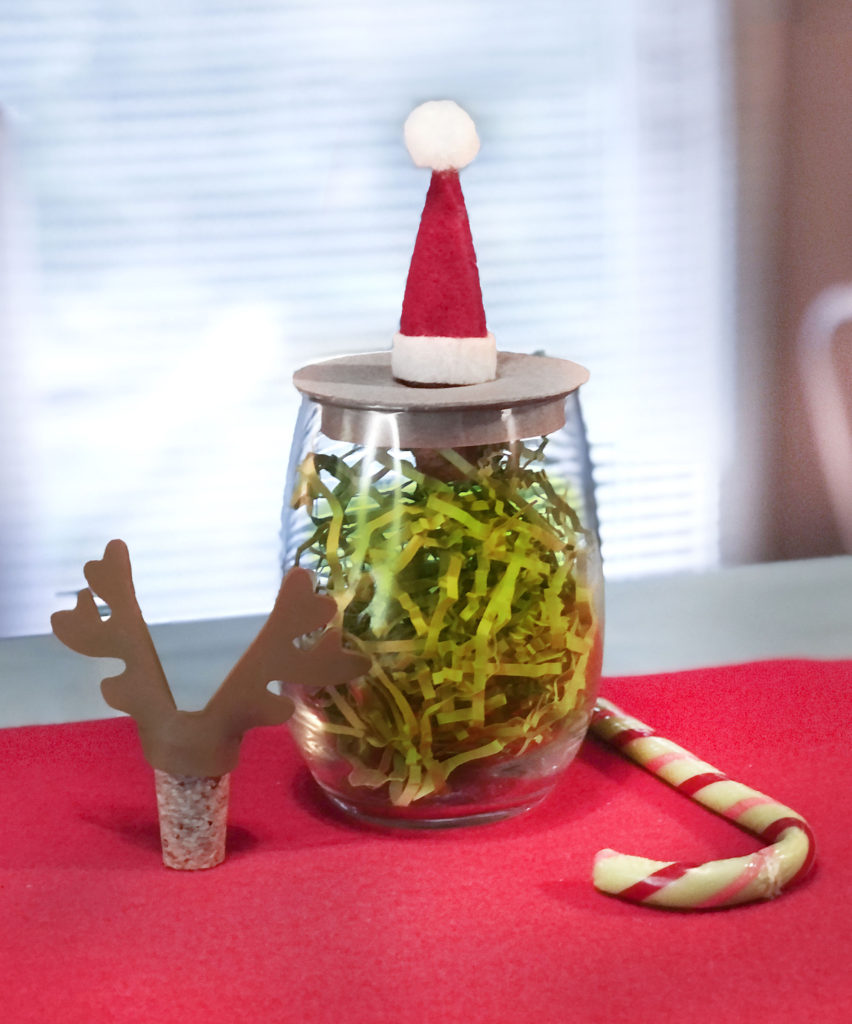
And we’re done! Put it inside the lid holder and you’re finished! You could go a step further and add some gold foil vinyl on the front with some cute little holiday saying like “Making spirits bright” or something like that.
Machine roller marks will show up on the craft foam. Use this as as the back side of the antlers
Glue circle to the wider end of the cork
Take your antler and put hot glue on the ugly side and wrap it around.
Finished reindeer cork
Let's make the Santa Hat Cork.
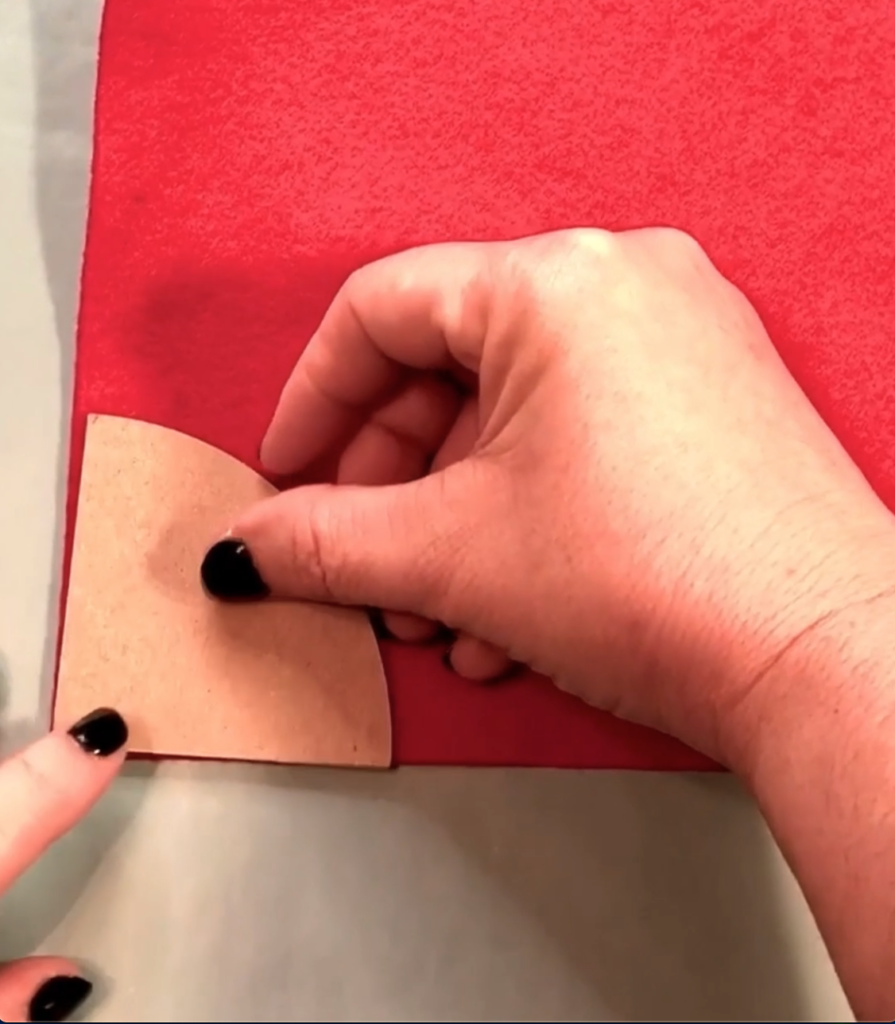
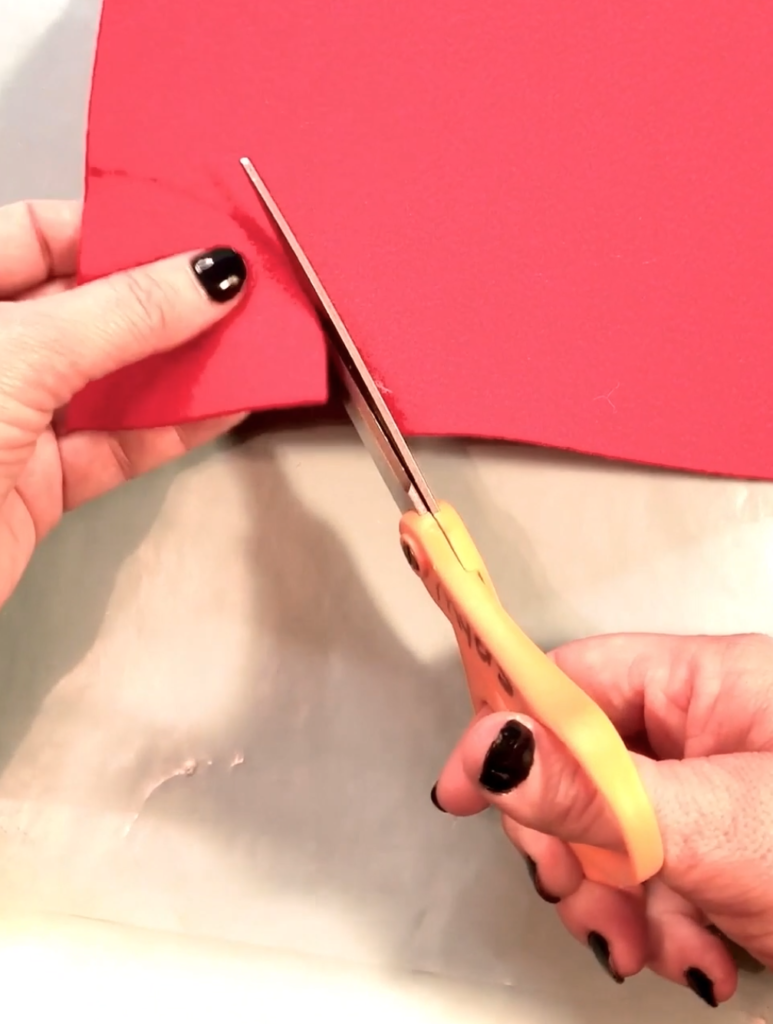
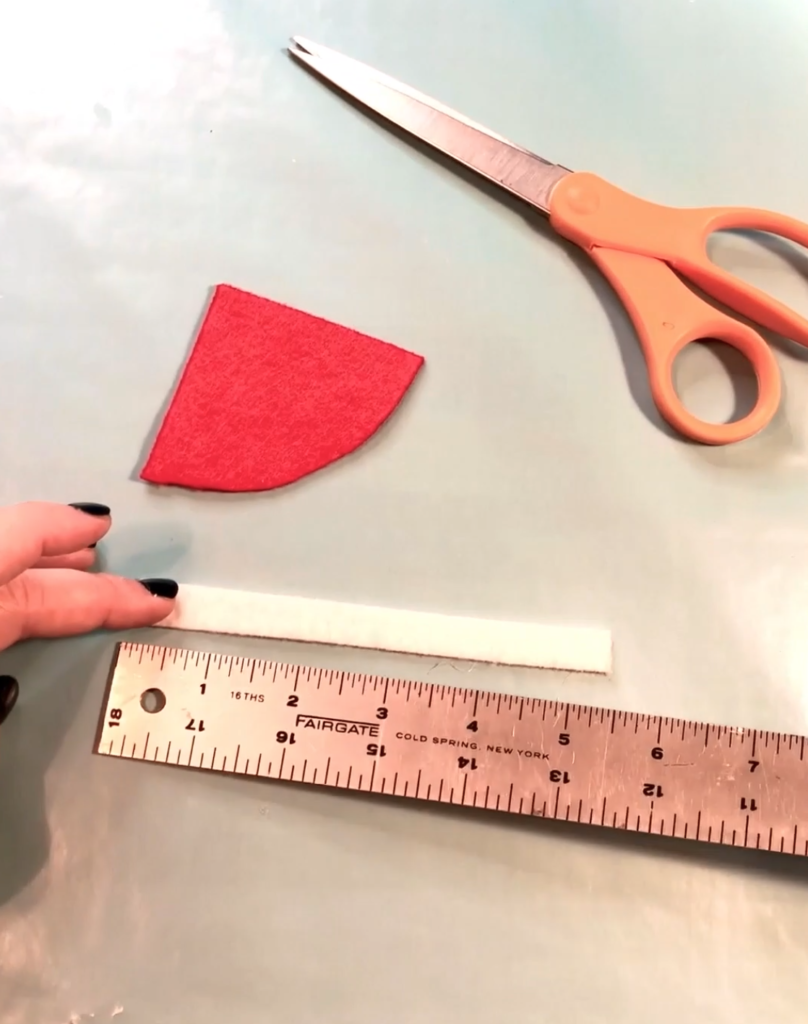
Ok, so I told you my Cricut doesn’t cut felt very well, so instead of using the Cricut to out our pieces, we’re going to do this the old fashion way…scissors. However, if you have a Cricuit Maker with the rotary blade, then you are welcome to cut this piece out using that. Earlier, we cut this arc shape with the chipboard and so I am going to use it as a template to cut my felt.
So I am putting the template at a corner of my red felt, tracing it with a pencil and then cutting it out with sissors. This is a really simple shape, so it’s not very difficult. I also cut out a long rectangle about a .5”h x 5“w in the white vinyl, just using sissors too.
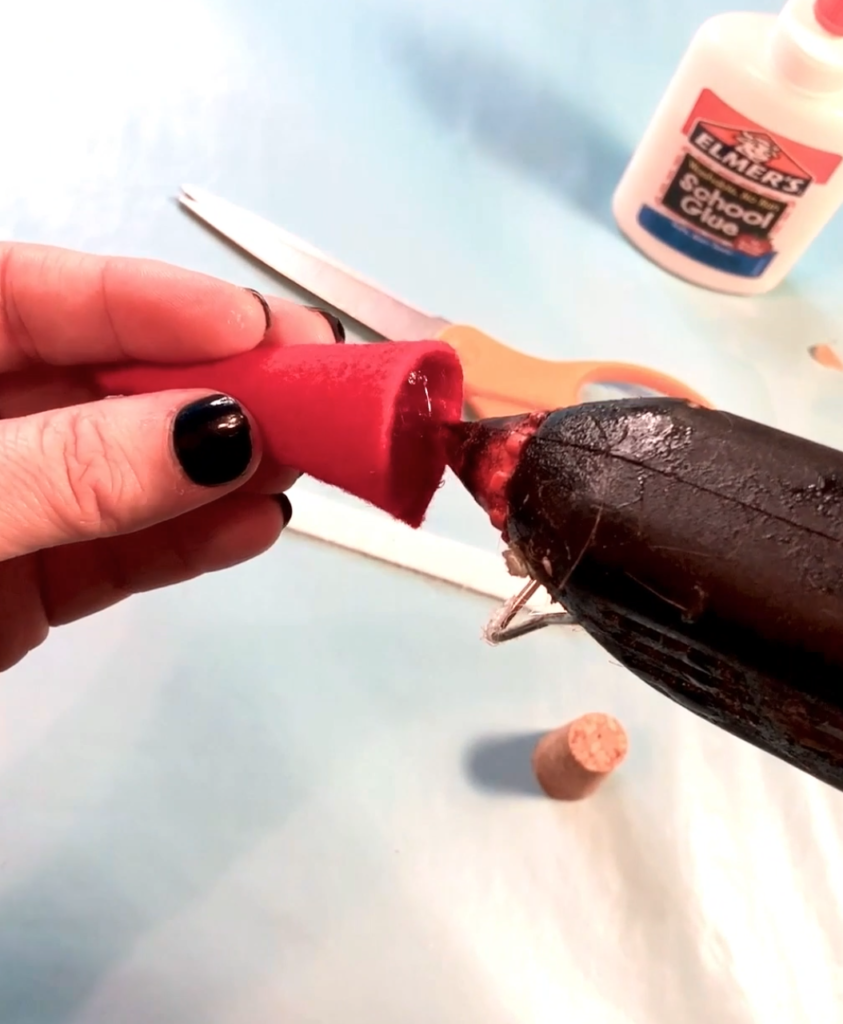
Now making sure that the pencil marks will be on the inside of the hat, I am facing the pencil marked side up and then we are going to fold both sides into a cone shape and hot glue it together.
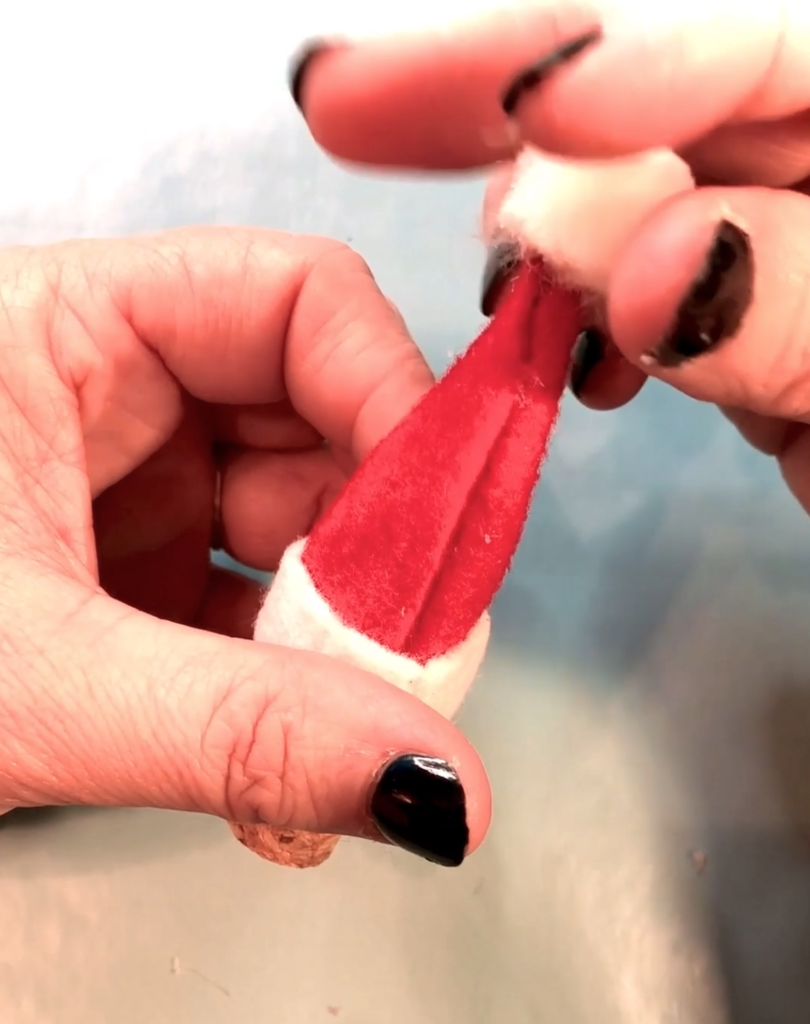
Just hot glue the wide side of the cork into the hat opening. Then take the white felt strip and glue it all the way around the base of the hat, making sure the bottom lines up with the bottom of the hat.
Finish it with gluing on a white little pom pom. Then you’re done!
Using scissors, cut out arc shape
Cut out a .5" x 5.5" strip of white felt using your scissors
Fold into a cone shape and hot glue together
Hot glue inside of hat
Hot glue the pom pom on top
Fold into a cone shape and hot glue together
So cute! Perfect gift for my besties! I might add some vinyl on the front that says “Jingle Juice” or something.
These are really cute and totally customizable. Maybe you could use green felt for the hat and put a jingle bell on top for an elf look too. Change it up and let me see your creations so tag me on social media!
Watch the tutorial here:
Share this:
I hope you all have a very Happy Holiday Season. Just a friendly reminder. Please drink responsibly and please don’t drink or drive. According to MADD, “Drunk driving is still the #1 cause of death on our roadways.” Y’all don’t be stupid, be safe. Hugs!
FTC Disclaimer: All opinions are genuinely my own. This post also contains affiliate links and I earn a small commission if you make a purchase after clicking on my links. It doesn’t cost you any extra. Thank you for your continued support.